You got here, so I guess you already installed the program. You didn't? You can find it here.
To install NetworX, simply download the installer here and start it.
Select an appropriate installation directory and proceed. As soon as the setup is complete, all components have been installed and you are ready to go. You will recognize NetworX by its icon:
Every transport map in NetworX essentially consists of stations and connections, called segments.
Every segment has a color, determined by its line. A line could be a bus, train, metro or ever a boat route.
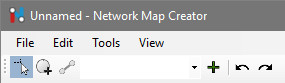
You can create a line by clicking the Plus-Button next to the dropdown menu on the top left.
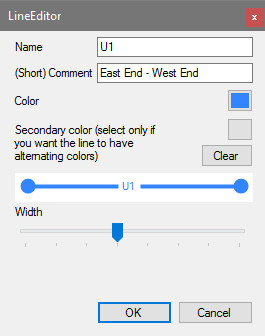
A new dialog opens, which lets set a few options to determine the appearance of the new line. You can, of course, give it a name. Additionally you have the option to specify a secondary color. The line then appears in a dashed style, this can be used to signalize e.g. part time services. After pressing "OK", the line will appear in the dropdown box on the top left.
Creating stations can be intuitive and easy, but become really complex fastly.
To create a station, select the create-tool  and click somewhere on the white editing area. A new station will appear.
By selecting the select mode and then double clicking on the station you can bring up the station editor. Here you can change the name, the rotation and position of the label, as well as which lines are displayed next to the station. Explaining everything in detail is way to hard for me right now, so just look at this gif:

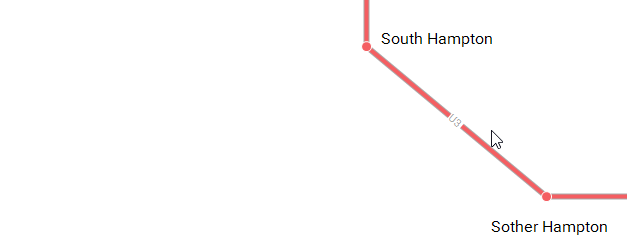
You can connect stations by selecting a line first and then clicking on the two stations you want to connect. You can change the style of the connection, by selecting it and opening the segment editor in the top menu:
You can place smaller or larger images (that totally depends on your taste, larger images increase the file size drastically so if that is a problem for you, you should stick to smaller ones) on the map. Just click Tools -> Add Icons and then eather From File to use images stored on your computer, or Search Online to use an online icon search api provided by Icons8.com (the api is slow as f*ck so you'll propably spend the most time waiting... sorry for that. The results are pretty decent anyway).
Just select a file on your computer in the file dialog that pops up. You're done!
A search box appears. The progress bar at the bottom of the window indicates the status of the search, at the beginning it appears in a loading state. After the box finished loading a list of icons appears and you can use the search bar. Type in a word you want to search for. If you want a plane icon for an airport for example, the results are better when you search for "airport" instead of "plane".
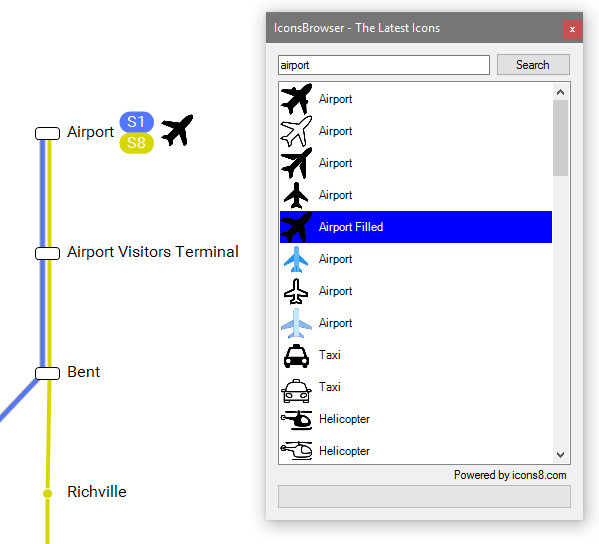
To use the icon, just doubleclick on the item in the list, it will then appear on the left top of the editing window. You can drag it aroung using the mouse, rotating and scaling works through the sticker editor dialog that pops up, when you doubleclick on the window. It is pretty self explanatory, so I wont discuss it here.
You can save and load files in the File tab on the top left. When saving, you can select between two different file types: Text and binary.
 Text files are larger in size and take longer to load, but are less sensible to errors.
With a new update there may have been changes in the way files are saved. If an error occurs during the conversion, binary files are most likely to be corrupted and can therefore not be loaded anymore. These kinds of errors may happen to text files, too, but they can easily be repaired.
Text files are larger in size and take longer to load, but are less sensible to errors.
With a new update there may have been changes in the way files are saved. If an error occurs during the conversion, binary files are most likely to be corrupted and can therefore not be loaded anymore. These kinds of errors may happen to text files, too, but they can easily be repaired.
you should not have a hard time using NetworX. I hope you like the application and dont experience major bugs or issues. The program will still be developend and served with updates regularly, so bugs and errors will hopefully be wiped out fastly. If you have issues, requests or ideas, please consider to message me, either through the in-built issue system of NetworX or by writing me an email to support@pxsnake.de.
Thank you for using NetworX :)